How to manage your authenton#1 FIDO 2 HOTP-Smartcard with Windows
How to activate HOTP SmartCard with Windows:
Foreword: The authenton#1 CTAP2.1 is a next-generation authentication token (FIDO2 - CTAP2.1).
To enable the migration from partially existing (older) security solutions to the current security solutions, the authenton#1 was designed to be backward compatible. This means that it supports older security levels like HOTP.
However, please note that HOTP is an authentication method of the "older generation" which has been replaced by the more secure standard FIDO2, and the latest standard CTAP2.1!
Therefore, our urgent recommendation is to migrate your security solution to the current security level: FIDO2 - CTAP2.1!
Comparison of MFA Security Levels:
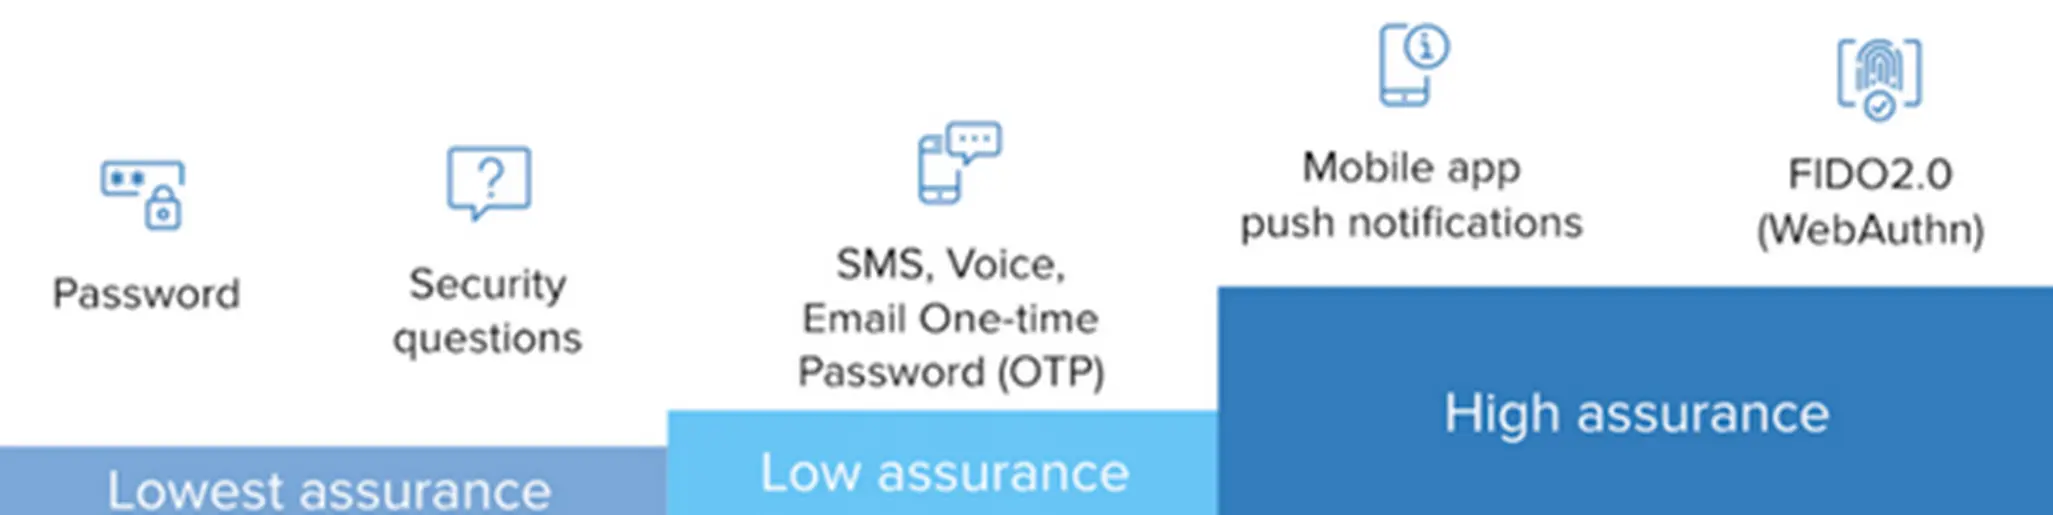
(Quelle: https://www.sharetru.com/blog/one-time-password-otp-authentication-methods-you-should-know-hotp-totp)
Important Note: The authenton#1 offers HOTP functionality. Unlike a smart card, the authenton#1 token does not require a smart card reader or the installation of smart card reader drivers and/or other software.Connect your authenton#1 token to your Windows computer via USB-A! Follow the further instructions as if using a "smart card".
Aktivierung der HOTP mit Windows
To activate an HOTP (HMAC-based One-Time Password) smart card with Windows, you'll need to follow these steps:
- Insert the smart card into a smart card reader: Insert your HOTP smart card into a smart card reader that's connected to your Windows computer.
- Install the necessary drivers and software: Depending on your smart card reader and HOTP smart card, you may need to install drivers and software to enable HOTP functionality. Check with the manufacturer for specific instructions on how to do this.
- Set up the smart card for Windows logon: To use your HOTP smart card for Windows logon, you'll need to configure it to work with Windows. To do this, go to "Control Panel" > "User Accounts" > "Credential Manager" > "Windows Credentials" and click on "Add a smart card."
- Configure the HOTP smart card: Once you've added the smart card to Windows Credentials, you'll need to configure your HOTP smart card. This typically involves setting up your personal identification number (PIN), selecting a user name, and choosing a password policy.
A user must enter PIN before some other action will be executed by HOTP Configuration applet. A default PIN value is 1234.
- Generate HOTP codes: With the HOTP smart card configured, you can generate HOTP codes that can be used for authentication. Unlike OTP, HOTP generates codes based on a counter rather than time-based. You may need to enter your PIN to generate a code. These HOTP codes can be used for secure authentication purposes, such as logging in to websites or accessing secure systems.'
- Use the HOTP codes for authentication: Once you have generated a HOTP code, you can use it for authentication purposes. Depending on the system you're logging in to, you may need to enter your HOTP code along with your username and password.
That's it! With these steps, you have successfully activated your HOTP smart card with Windows and can now use it for secure authentication purposes, including logging in to your Windows computer.